Showing posts with label cooking. Show all posts

Wednesday, August 26, 2015

On Losing Weight: What to do when you hit a plateau

I think there comes a point in every weight-loss journey, when you stop losing weight. For whatever reason, things just slow down and eventually stop losing weight. At the beginning of this year, I lost the little bit of weight I put on over Christmas, and then... nothing. I was doing the same things, eating the same stuff, and nothing was happening. I know it is the most frustrating thing, I'm with you, kids. I got really disheartened, because I knew I still had a bunch of weight to lose, and it was just very frustrating for me. I felt like I was doing all the right things, making good choices, and nothing was happening.

what to do when you hit a weight loss plateau

In March this year, I started in a new job, but it became harder to lose the weight. I'd gone from being up and about and on my feet all day, working shifts and being able to fit it in the gym around my hours - to working in an office, sat down from nine to five, and being so sleepy in the evenings. I kept trying to go to the gym, but something just wasn't working anymore.

June rolls around, I realise I've gained about six or seven pounds. Not a lot, in the grand scheme of how much I've lost, but enough to make me feel a bit gross, a bit sluggish. In July I get the call saying my appointment has finally come up on the NHS waiting list, I'm off to get my gallbladder taken out, I can't exercise for about a month and spend two weeks lying around feeling sorry for myself. Now I'm starting to get back into a routine, and I feel horrible in myself, I wake up most mornings and I'm still tired and sleepy and lethargic. I'm getting back on track with my eating, but I want to kick start things. I'm going to New York later in the year and I want to be a bit lighter, a bit more free to do things.

So what now? I know that the gym I was previously going too, wasn't working for me anymore. It was a lovely place, but it's not motivating me enough, the hours don't suit me anymore, and I know that doing what I've always done, is not going to work anymore. When I was was (almost) 100lbs heavier, doing a bit more of any exercise or eating less than I had been doing would've made me lose weight, but now I am a lot lighter, I'm realising that this won't cut it anymore.

And so I found the most crucial thing to my weight loss journey, which is basically to...

C H A N G E   S O M E T H I N G

I mean, you made a massive commitment to kicking this shit off in the first place, didn't you? So why are you so afraid of change?! I'm mostly talking to myself here, by the way - I don't know why I was so terrified to try something new, I guess cause this thing I had been doing worked for me - it worked really well!
I had built up a security blanket around me, of how I got fit, how I lost weight. This was very much sticking to what was safe. Which is all good and fun, and I'm not knocking the method that I used - the way I lot weight really did work for me. But then I know I hit a point where I grew bored, grew complacent, and grew tired. Things slipped, I started reaching for more chocolate, dragged myself to the gym less...

So I decided to change things up a bit. Looking back at the periods of my journey that I enjoyed most, it was things like the month I quit sugar, the two weeks I went veggie... For me trying out running was an amazing learning curve, which I began to document right here on my blog! It also meant, trying to quit sugar for lent, which was semi-successful.. but even if these things aren't the most successful processes, you grow and you learn from it, and you take away things that work for you, and the things that don't.

For example, if you always use a meat-based protein in your meals, maybe try vegetarian proteins instead, and stick to that for a week - it makes you more creative in your cooking, makes you try food that you might not ordinarily go for.
Similarly, if you always use white rice, flour and pasta, maybe try doing brown flour for a bit, in doing this I realised brown rice was really nice, and some brown pasta is disgusting! I also discovered I really love beluga lentils and pearl barley. I was talking about this with my friend at work: you really have just got to find the thing that works for you, that you can get on board with.

This month, I joined a new gym. It's a big fancy gym, full of super-fit people, and proper gym equipment that scares me. But in a good way - I need this, the hours and equipment suit me better, but it does scare me. Even though I've done so much for my health, I will always feel like the fat girl, and I want to change this mindset. I feel like I've been wrapped in my blanket for too long, when it comes to losing weight - I want to get out there.

I think I'm quite old-school, in that the end of the summer feels like the end of the year: Autumn is around the corner and it always makes me think of new school years, and fresh starts. It's all good fun, is what I'm saying, and I think it helps kick start you when you're in a bit of an eating, exercise, weight-loss rut, and it helped me shift a few pounds. Now I'm wondering what I should try next...

    Monday, July 27, 2015

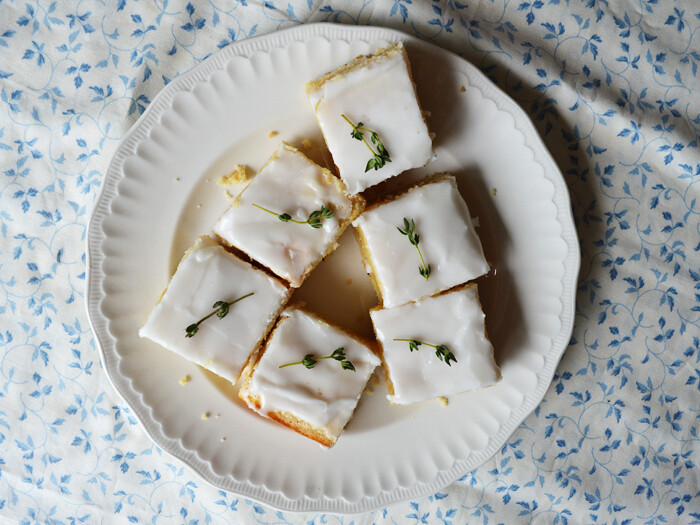
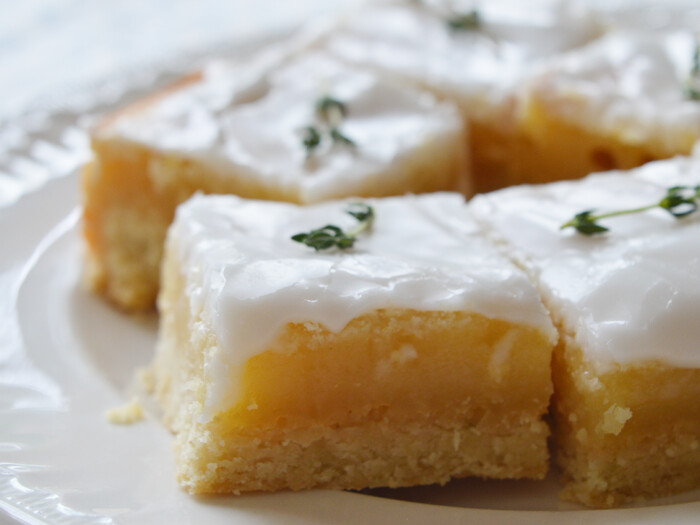
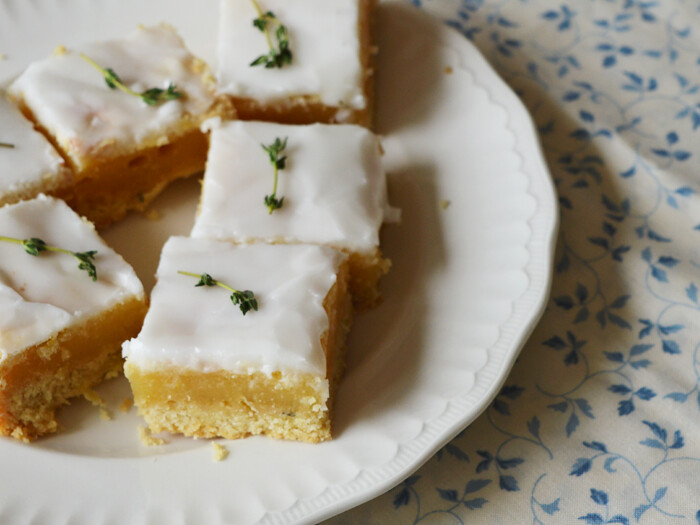
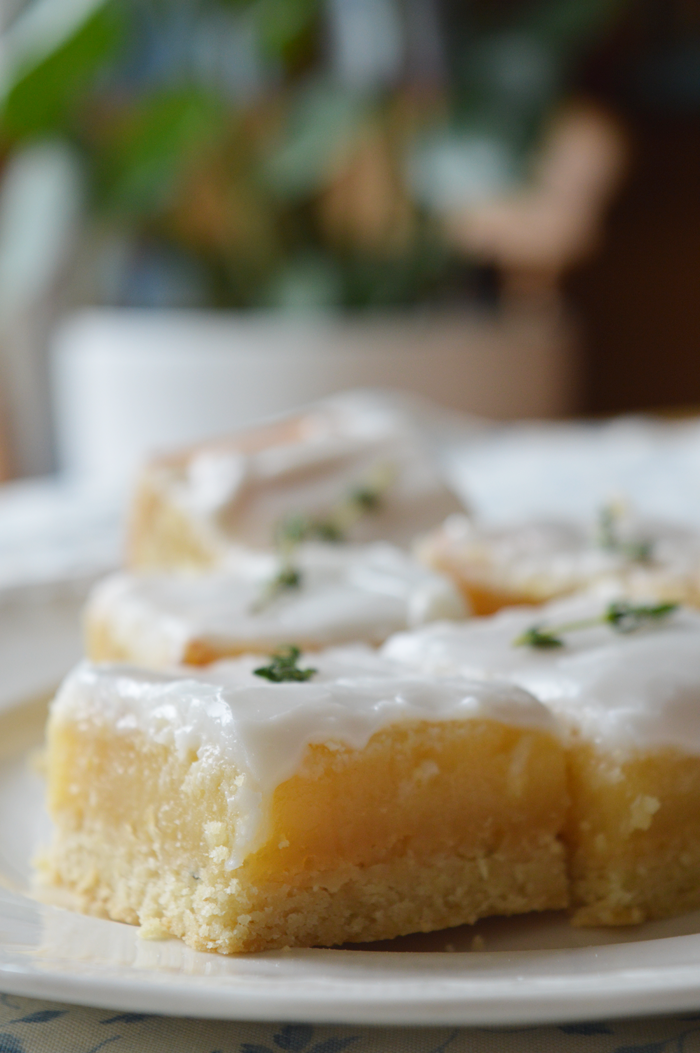
    recipe: lemon and thyme bars

    I find it interesting how your tastes change as you get older. The twenty-five (ew) year old me lives for the sharpness of lemons, the tang of olives, the acidic taste of white wine, and the bitterness of black coffee; all things that the eighteen year old me would have turned her nose up at. At eighteen, I wouldn't have gone near a gin and tonic with a twist of lemon, last night found my hunting the cupboards because I couldn't find any gin!

    It is weird that now I am twenty-five I think that the bittersweet taste of a lemon perfectly sums up summer. It reminds me of drinking cloudy lemonade outside on hot days, of squirting it on fresh cooked fish, and eating lemon ice-lollies.

    Anyway, when this unsuspecting little recipe popped up on Pinterest the other week, when we were having that amazingly hot weather, I ran out as quickly as I could and bought a batch of lemons... I did not regret it. 

    lemon and thyme bars
    lemon and thyme bars
    lemon and thyme bars
    lemon and thyme bars


    For the recipe, keep reading;

    Monday, June 29, 2015

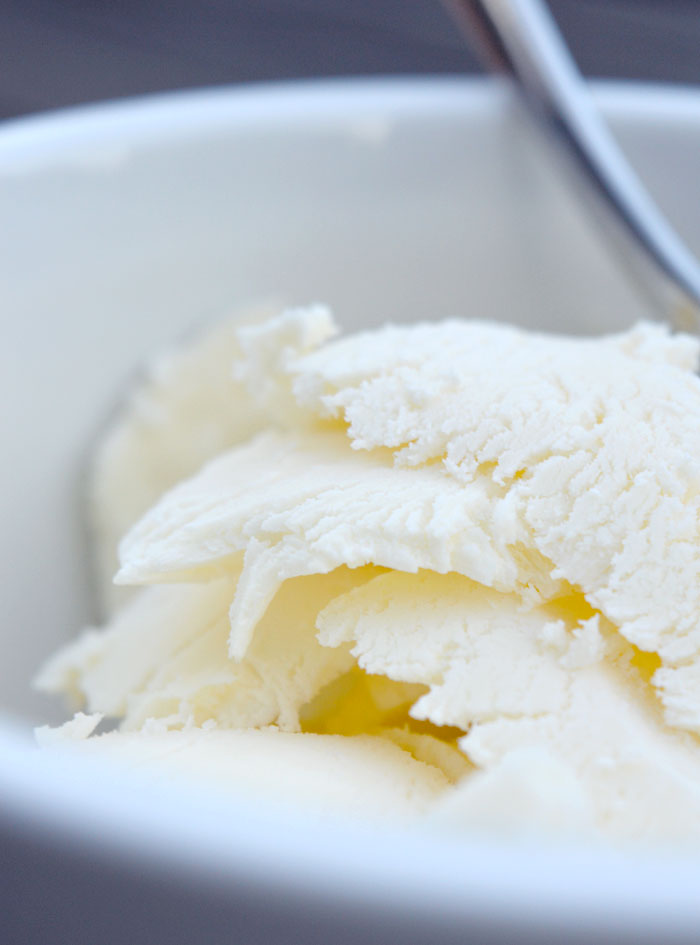
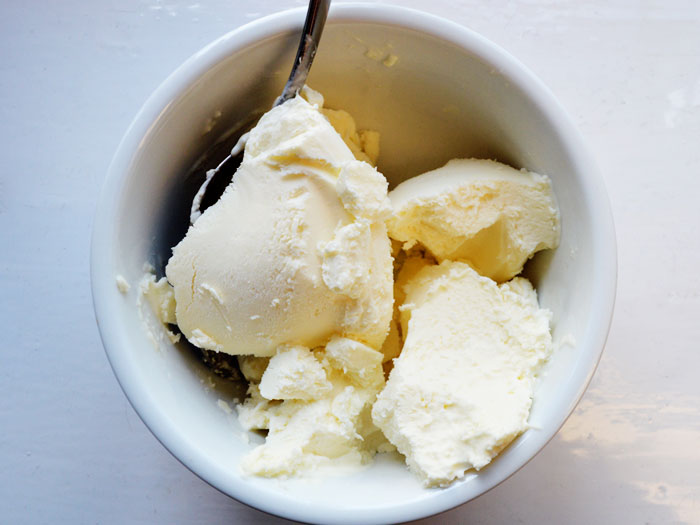
    homemade pina colada ice-cream recipe!

    Look, I could've easily gone with a if you like dancing in the rain, you'll like my ice-cream sort of title, but thought I'd be chill, because I was hoping I'd get your attention anyway with this bowl of deliciousness.

    pina colada ice cream recipe
    pina colada ice cream recipe

    This is no recipe of mine, but one from Nigella Lawson, whose way of describing food disturbs me (something too sensual about it for my British sensitivities) but her recipes are always some of the very best. I suppose that's why she's good at what she does - that and she looks great in a wrap dress and was married to a multi-millionaire but I digress.

    It's so freaking easy to make, it tastes phenomenal, and when you say you've made your own ice-cream sans ice-cream maker, people think you're some sort of culinary genius, when you're really just a bit lazy.

    For more pictures and the recipe, keep reading;

    Monday, April 27, 2015

    new in: espresso cups and black coffee

    This was sparked out of a conversation I had with the lovely Gemma recently on Twitter (whose blog, Hello Gemma, has had a rebrand, and looks amazing!) about coffee. She was talking of her fear of a milky coffee, whereas I have a fear of people drinking jet black, iced coffee. I don't know how you do it, it filled me with fear until about two months ago, when I suddenly decided that wow, hey, black coffee is actually quite nice?

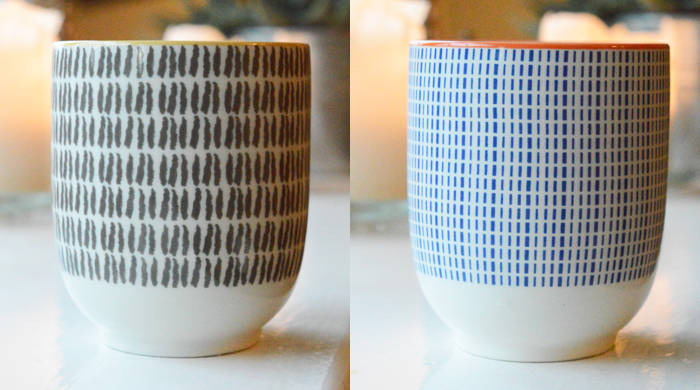
    espresso cups
    espresso cups

    I think it very much depends on the type of coffee you buy, also. I discovered this amazing coffee in Waitrose when I worked there, the Guatemala Antigua by the brand 360 / Three Sixty. It's an amazing, well balanced blend that tastes excellent when it's freshly brewed, hot and senza milk.  
    I tried it once or twice, and decided it really wasn't that bad! And sometimes, you haven't got time to sit and mull over a frothy latte, sometimes you're in a rush in the morning, and you've just got to put your coffee on to brew whilst making your lunch for the day, and then knock it back before running out the door, haha.

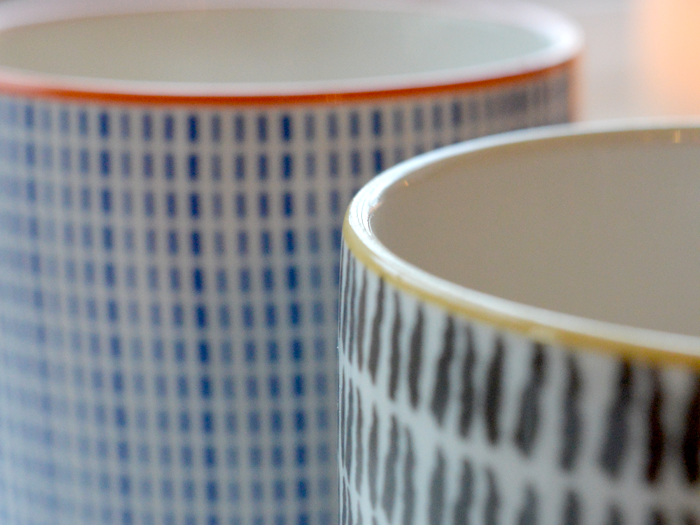
    This new revelation warranted a new purchase, obviously, so I picked up these adorable little cups in Sainsbury's back in February (I've seen them a lot on blogs and stuff, though, so they probably still do them). I think they're actually supposed to be like Chinese tea cups, because they seemed to be with a lot of stuff around Chinese New Year - however, they make the most perfect espresso cups, I'm obsessed with them. 

    I've not disowned my one true love - a sweet, milky latte - though, don't you worry, but I've just realised there are other coffee options out there. It took me about ten years to realised that black coffee was pretty nice, and that I'm perfectly capable of drinking coffee with no sweetener. So it'll probably take me about another ten years to go off milk! haha.

    espresso cups

    Wednesday, April 22, 2015

    Super easy seasonal iced biscuits!

    If you're blogger, you should remember to post your content when it's most relevant, really, shouldn't you? Like, who wants a Christmas gift-guide on the 24 December? Anyway, I'm being a shit blogger, because I completely forgot to post my Easter biscuits, and now Easter is almost a month behind us, but hey-ho, I'm showing you them anyway, because they look goddamn adorable, I think.
    My mum called me on Good Friday and showed me the biscuits she'd made, asking if she wanted me to help ice them... Who am I to resist?! 

    easter biscuits
    easter biscuits

    The recipe for the biscuits itself, I can take no credit for - my mother made them, and I only iced them! But she reliable informed me that the recipe she used was this one from The Pink Whisk and they tasted amazing when baked to perfection. She also tells me that she used vanilla powder in place of vanilla essence! 
    INGREDIENTS AND EQUIPMENT:
    - 1 pack of Royal Icing or Icing Sugar
    - Water at room temperature
    - Several piping bags (or sandwich/food bags if you're cheap like me haha)
    - Several small bowls and teaspoons
    - Food colouring
    - Cocktail sticks
    1. Mix the icing to the instructions on the packet, depending on what brand you use, most of them will tell you how much water to add to the icing sugar. We measured out the water and then added it until I got the consistency I wanted. At this point, you want the icing to be quite thick, thick enough that you can pipe it and it will hold it's shape.
    2. Split the mixture between bowls evenly, and add the colouring. For pastel colours, add a very small amount of the colouring, and mix well.
    3. Spoon some of the thick icing into the piping bags (leaving some for flooding the biscuits) and pipe around the edge of the the biscuit shape to create an outline. For shapes like the eggs, pipe the desired design (like stripes or zig-zags).
    4. Set aside and allow this outline to dry until solid and hard.
    5. Add more water to the remaining icing in the bowls to create a more liquid consistency, it should run off the spoon with ease.
    6. Using small teaspoons, add a small amount of the runny icing inside the outline you've already made.
    7. To move the icing into the corners of the shape, tilt the biscuits or gently move with the back of a teaspoon. This is also where the cocktail sticks come in useful, to push the icing into awkward corners and to get rid of air-bubbles.
    8. Allow to dry until completely hard.
    These went down an absolute treat in our house, I must say! And there was not one child in sight, haha, but I imagine they would go down very well with kids. I think the yellow chicks and the blue bunnies were my favourites, and if you're interested, we got the biscuit cutters from Waitrose, they do a great selection of seasonal ones for Easter, Halloween, Christmas, etc.

    Have you got a favourite biscuit recipe you go for?
    - recipes -

    easter biscuits
    easter biscuits

    Wednesday, April 01, 2015

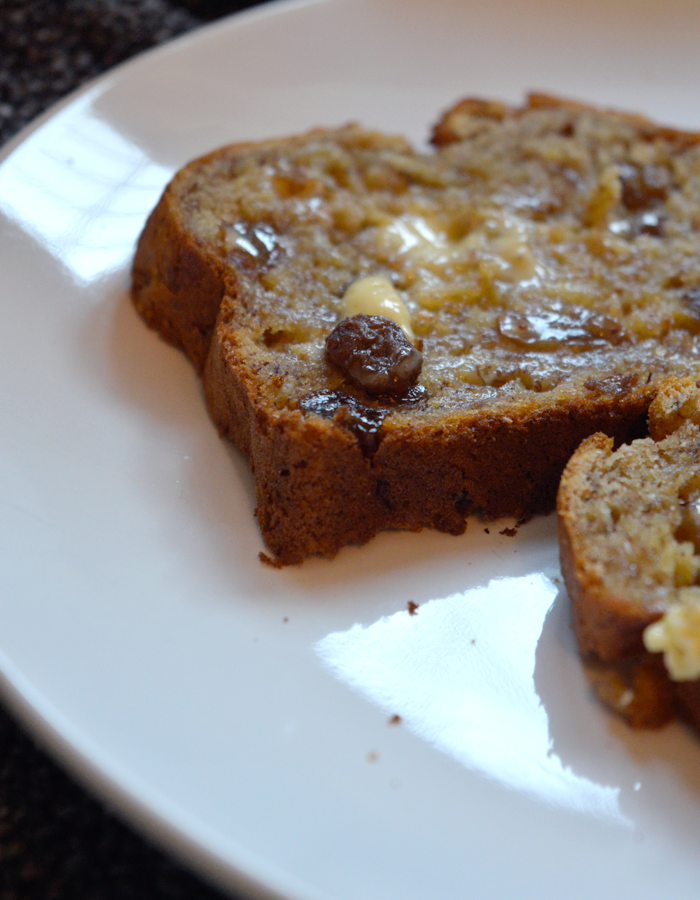
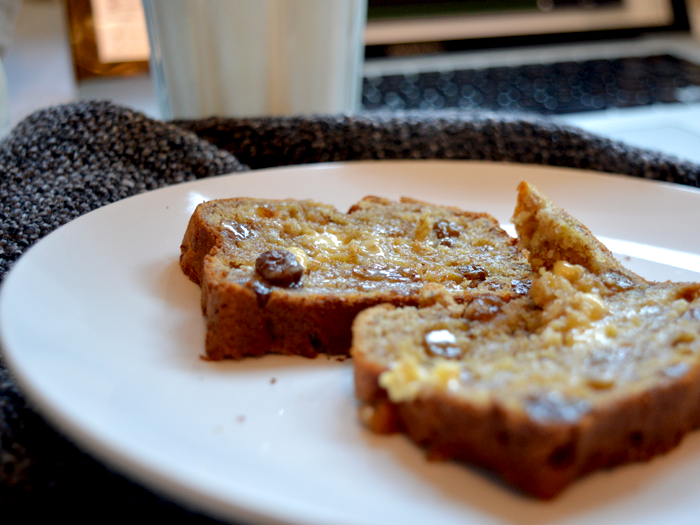
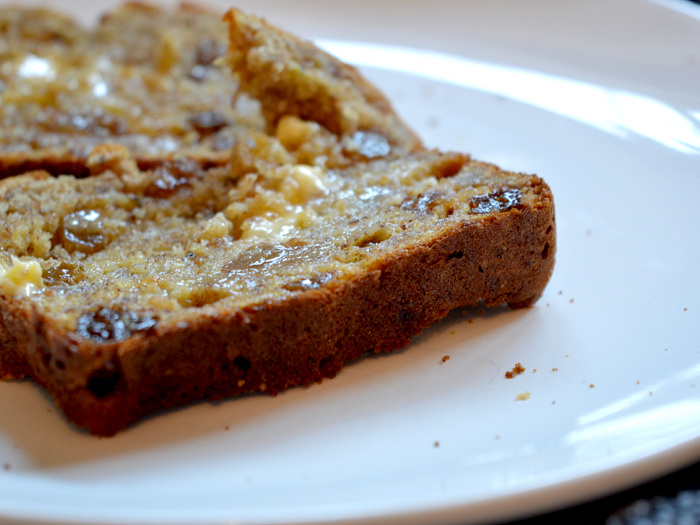
    sugar-free banana bread recipe

    I was recently talking to some bloggers about authenticity in blogging - and to cut a long story short, the way I would describe it is this; some bloggers tell you that they make a recipe, following it to the letter. They sieve the flour, let the eggs sit at room temperature over night, they use the five or six different bowls required, weigh everything to the the .99th of a gram, and never lick the spoon. I am not one of those bloggers. I admit to you, freely, that I never sieve my flour, create as little cleaning up as possible, and always lick the spoon (and before you start on about raw eggs, just pipe down). Basically, I know baking is a science, blah blah blah, but my mother was a chemist, and this is how she raised me. Mother knows best, and all.

    This is all rather a long tangent, but I thought you'd like that little analogy, and I thought I would show you my most recent favourite 'throw it all in and shove it in the oven', recipe. Sugar-free banana bread! Banana-anything is my vice, I've heard tell of people that exist that don't like bananas, and I wonder how do you live? What do you put in smoothies? How do you fuel yourself before a run? What do you smother with cream and chocolate sauce and place on a waffle and tell yourself it is healthy because it has fruit in? I'm going off on a tangent again, aren't I? Onto the recipe.

    sugar free banana bread with wholemeal flour
    sugar free banana bread with wholemeal flour
    INGREDIENTS:
    - 125g self-raising wholemeal flour;
    - 1/2 tsp baking powder,
    - 2 tsp ground cinnamon;
    - 75g sultanas;
    - 50g butter, melted;
    - 2 tsp vanilla essence;
    - 1 egg;
    - 1 tbsp milk;
    - 3 ripe bananas, mashed.

    1. Preheat the oven to 180C/160C fan/Gas mark 4. Grease and line a small tin with baking parchment.
    2. In a large, microwavable bowl, melt your butter in the microwave. Add the vanilla essence, egg, milk and mashed banana.  Mix until everything is mixed together well.
    3. Add in the dry ingredients (flour, baking powder, cinnamon) and sultanas and mix well with a wooden spoon.
    4. Pour into the lined cake tin and bake for 30-40 minutes, or until a a skewer inserted into the centre comes out clean. Allow to cool in the tin and then turn out.

    Adapted from this BBC Good Food recipe for banana cake (adapted in that their recipe was incredibly badly worded!).
    A few notes about this little recipe, it only makes a small amount, but the cake itself is quite a dense one, so I find that I don't get through it very quickly, so don't be fooled into doubling the recipe (like I did once!) unless you've got a lot of people coming over. Obviously, you can also forgo the sultanas if you don't like them, but I place you people in the same category as those that don't like bananas: mad.
    I find it's at it's peak when eaten warm from the oven with a bit of butter, or toasted for breakfast with a glass of milk. The brown flour takes some getting used to, but it leaves me feeling full and without that awkward bloated feeling that I get from eating white flour, so I'm pleased with that, too.
    Essentially, this cake is really good I'm really pleased to have found this recipe, and its going in my repertoire for future use!

    sugar free banana bread with wholemeal flour

    Wednesday, March 18, 2015

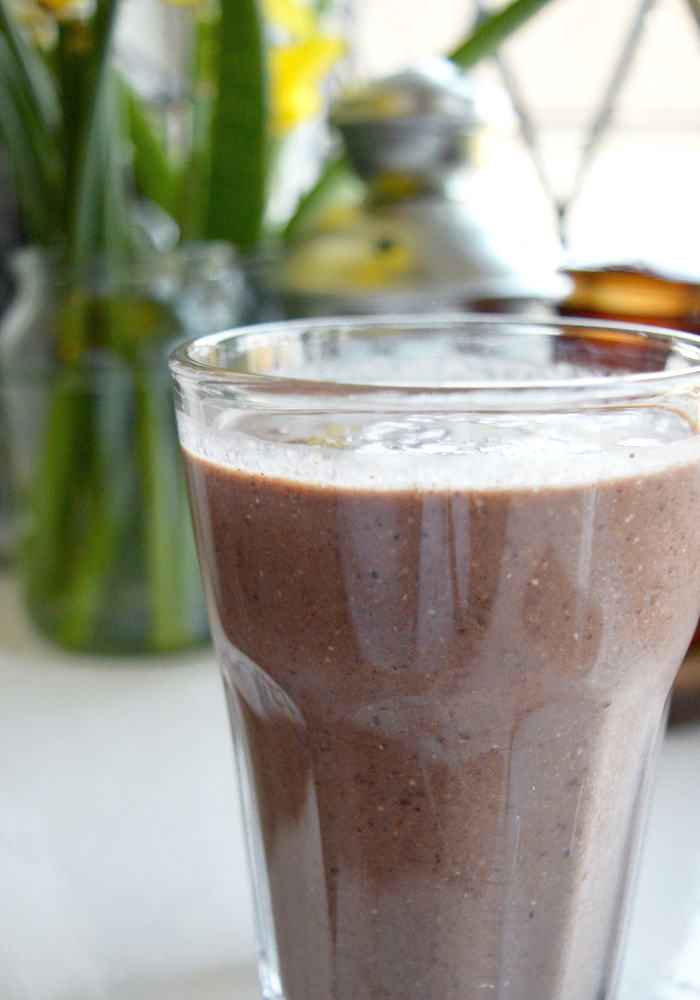
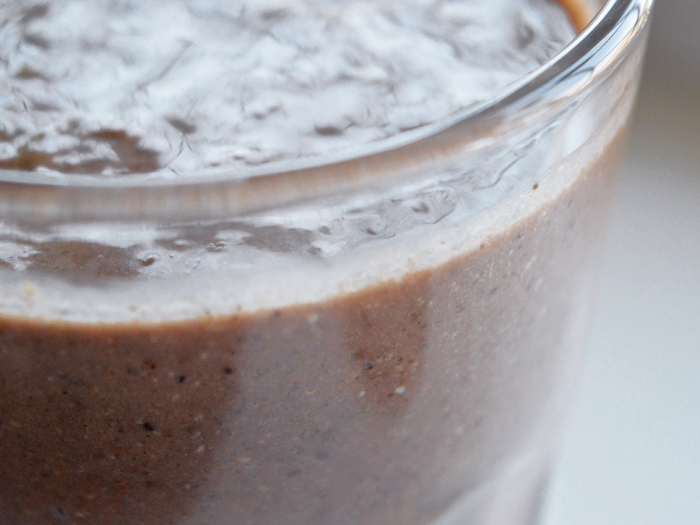
    banana, chia seed, cashew butter and cocoa smoothie

    banana, chia seed, cashew butter and cocoa smoothie banana, chia seed, cashew butter and cocoa smoothie

    The alternative title for this post was 'the only smoothie recipe you'll ever need' , because really, I sing it's praises that highly. I've made it three times now, and I love it more each time. I originally got it from the Meridian nut butter website, but I've lost the exact link (I'm sure you can find it somewhere), but I have adapted it a wee bit to suit me.
    For me, this is the perfect post-run, post-workout drink. Sometimes I just have it for breakfast if I'm feeling really indulgent at the weekends, and it tastes amazing, plus it's packed with lots of protein and other goodies, so it doesn't feel quite as bad as downing a giant bottle of chocolate milkshake....
    INGREDIENTS:
    - 1 tbsp cocoa powder;
    - 1 tbsp chia seeds;
    - 2 ripe bananas;
    - 1 tbsp cashew nut butter;
    - 1 cup (250ml-ish) of milk of your choice;
    - 1 tbsp cacao nibs*;
    - 1 tbsp protein powder**.
     
    1. Theres not much method to a smoothie (you basically just chuck it all in) but I recommend whizzing together the cacoa nibs (if you're using them) and chia seeds together first, to get them a bit finer, because they do make your smoothie a bit chunky. 
    2. Add the rest of the ingredients, and blend until smooth. 
    *I consider these optional, because they're kind of hard to find. I had to get them from Holland and Barrett, and they're not cheap for a giant bag, so just to warn you. Also, I'm not sure they add a great deal. I like to leave them kind of chunky, and they make the smoothie a bit more like a pudding, because you have to chew them. But basically, they're not essential. This will still taste good without. 
    **I also consider protein powder a waste of time, unless you're a serious body builder or whatever, I don't see the point of it, and I think it tastes awful! haha
    Let me know if you try this! I really think it's so good, I'm on a mission to convert everyone to it...

    Monday, March 02, 2015

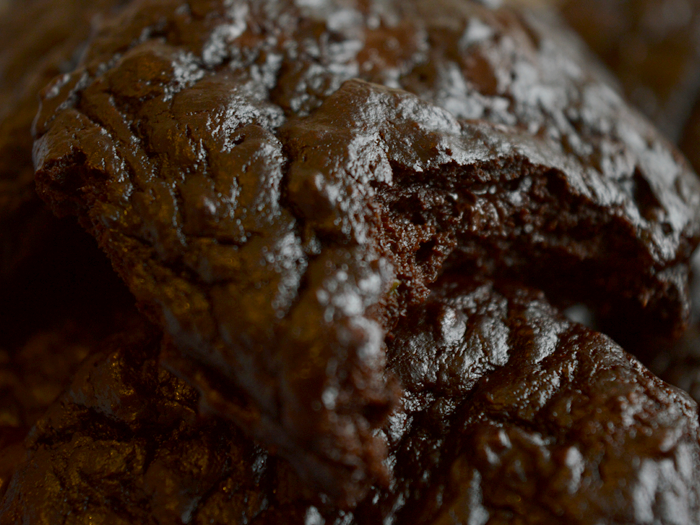
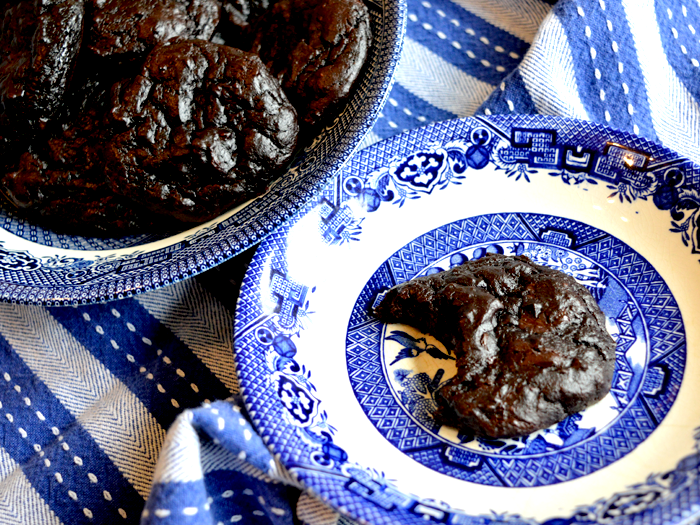
    healthy choc-chip cookie alternative: avocado, banana + chocolate cookie recipe


    As you may or may not know, I am trying to eat 'sugar-free' for lent. This is flexible, though, I give myself the weekends off, in that if I want to eat white flour or what have you, I'll do it on these days and it's really just a kick up the bum I needed to get my eating habits way back on track. I've lost about 6lbs since starting! Because of this, I have been trying really hard to keep away from cakes, and sugary things, but occasionally, I crave a sweet, cake-like something. 
    I scoured blogs, Pinterest, Instagram and websites for some lower-sugar sweet treats, and I'm building a good repertoire. I've got some excellent oat and apple flapjack bars and some whole-wheat banana bread that I'll be sharing soon, but after posting these on Instagram, I got a few requests to share you, so I'm going with this one first!

    Anyway, a few notes on these cookies... They are good. However, I personally only really loved them when they were fresh out of the oven and all melty inside. The original post I adapted this recipe from said she preferred them out of the fridge - and to me this made the cookies too thick and a bit claggy - but my mum loved them like this! So who knows, you should definitely try them and see what you think. I love them hot, with a dollop of creme fraiche or some vanilla ice-cream...


    INGREDIENTS:
    - 1 medium avocado
    - 1 medium sized banana
    - 1 egg
    - 1 tbsp of honey, or more or less, depending on how sweet you like your cookies
    - 50g of dark chocolate, chopped into chunks (I used 90% cocoa solids)
    - 1/2 cup of cocoa powder (about 60g)
    - 1/2 tsp baking soda
    1. Preheat oven to 175C/350F/Gas Mark 4.

    2. Mash a ripe avocado and banana in a bowl, then use a hand mixer (or you can do it in a food processor) to make the mixture as smooth as possible, I found a wooden spoon didn't quite cut it.
    3. Add the egg and honey, and mix well with hand mixer or processor.
    4. Add the cocoa powder and baking soda, and mix in with a spoon.
    5. Stir in chocolate chunks with a spoon, and then I put my mixture in the fridge for 10 minutes, as it was a bit sloppy to handle, well.
    6. Dollop spoonfuls onto a lined baking tray, I used an ice-cream scoop that I use for cupcakes, etc. The recipe I based this on said it yielded 10 cookies. I managed to get 9 pretty decent sized cookies. You could make them smaller and get more.
    7. Bake for 10 minutes, the cookies will go sort of shiny on top, and the aren't as wet looking any more. They are very dark, almost black cookies, so it's hard to tell how they're cooking, so keep an eye on them!
    8. Remove, allow to cool and go a bit more solid, before transferring to a wire rack to cool completely.
    9. Store in the fridge, and eat with a glass of milk, obviously!
    Some notes on the original recipe from The Smoothie Lover: I have no idea where I would even get coconut sugar, so in the notes she says you can use banana instead, so I went with that. After tasting it, though, I found that the mixture was kind of bitter for me, so added the honey as well, and this combination is perfect! I am considering trying them with no avocado next time, and just two bananas.
    I also normally wouldn't advocate the use of a hand-mixer, but I found it was hard to get the mixture smooth with just a spoon, so I would recommend it, or a food processor, etc.

    I had lots of requests on Instagram for the recipe, so let me know what you think or share with me if you try this out... I'd love to see what you thought of them!

    Monday, February 23, 2015

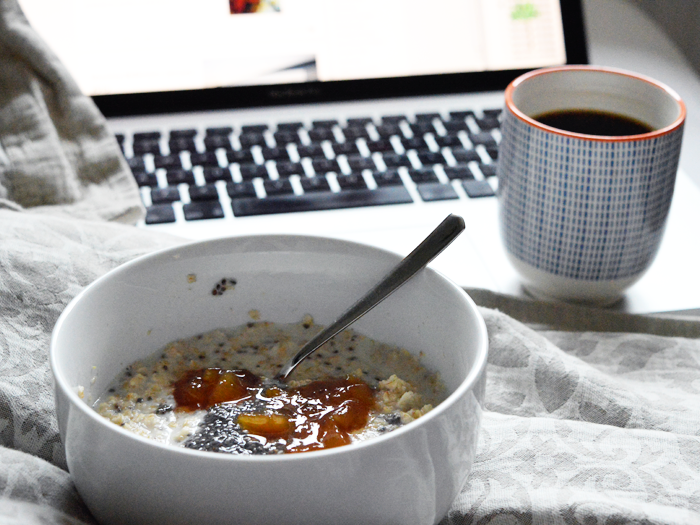
    the perfect breakfast: chia seed and peach jam porridge


    A few months ago, I shared with you my recent affection for porridge, and how to make it really quickly. My affection is unwavering, especially since discovering this somewhat decadent breakfast that I can't help but wanting every morning. It's perfect for cold and crisp weekdays, the peach jam cutting perfectly through the milky porridge, warming you well and filling you up until lunch. I've also discovered the magic that are chia seeds - full of protein and omega 3's, they're great soaked in milk or water, and get a really weird, jelly-like texture to them.
    INGREDIENTS:
    - 1/2 cup porridge
    - 1 cup semi-skimmed milk
    - 1 heaped tablespoon of chia seeds, with enough milk or water to cover them.
    - 1 tablespoon of peach jam
    1. Measure out 1/2 cup porridge, and 1 cup semi-skimmed milk, in a microwaveable bowl. You don't have to use cup measurements, it's the ratio that is important here.
    2. At this stage, measure out your chia seeds and cover them with milk or water (I normally do this in the cup I measure the porridge and milk out in). Stir to make sure all the chia seeds are covered in liquid and set aside.
    3. Microwave the bowl of porridge and milk on full power for 1.5 minutes, then take out and stir well.
    4. Microwave the porridge for a further 3.5 minutes, taking out and stirring well every 30 seconds, taking care not to let it boil over, the stirring is very important here.
    5. When the porridge is thick and creamy, take it out and stir the chia seed mixture into the porridge, or just place on top.
    6. Add jam to taste, and eat!

    Friday, December 26, 2014

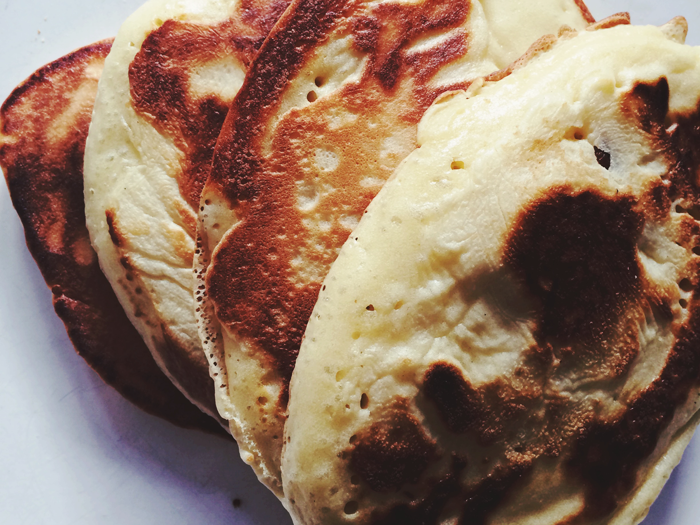
    boxing day breakfast or brunch: drop scone pancake recipe


    Well hello everyone! I hope you all had a lovely Christmas Day and are gearing up for 2015 nicely. I thought I'd show you all a somewhat indulgent idea for a breakfast on a chilly Boxing Day morning.. 

    A drop-scone (or an american style pancake, if you like) is one of my favourite things to make. They're so quick, so easy, and so amazingly tasty. They're a thousand times better than the ones you buy pre-cooked, and the batter only takes minutes to whip up. They'd be an amazing thing to pull together for a New Year's Day breakfast (er, brunch?) if you're all feeling a little fragile, and unlike croissants, require minimal effort. The hardest part is basically wondering how many you can scoff down before anyone notices.. 
    INGREDIENTS:
    (makes about ten-twelve decently sized pancakes)
    - 125g self-raising flour
    - pinch of salt
    - 25g caster sugar
    - 2 eggs
    - 25g melted butter
    - 100ml milk

    1. Sift flour into a bowl, and yes, this is a rare recipe when I actually sift it. Generally I can't be bothered, but no-one wants a lumpy pancake. Stir in the salt and sugar.
    2. Make a well in the middle of the flour, and add the eggs. Pour in a little of the milk and begin to beat.
    3. Gradually add in the rest of the milk until the batter has a smooth consistency and drops drop from the spoon.
    4. Place butter in a microwabable bowl and heat until melted. When batter is ready to be cooked, add the melted butter and stir in.
    5. Heat a frying pan until a bit hotter than a medium heat and add something to stop pancakes sticking (I usually use sunflower oil, but just a little.)
    6. Using a tablespoon or an ice-cream scoop, spoon the batter into the frying pan and cook.
    7. When the pancakes are beginning to bubble, and have gone solid around the edges, flip the pancake over and cook until golden brown.
    8. If using a small pan and making several batches of pancakes, keep a plate warm in the oven with the pancakes on. Serve immediately and eat hot with lots of butter, golden syrup, blueberries, nutella....

    Recipe adapted from one by Hugh Fearnley-Whittingstall.

    Saturday, December 20, 2014

    a lesson in patience, or how to make croissants


    I think one of my defining characteristics is my lack of patience. With people, at appointments, in shops, at traffic lights.. and when cooking, particularly. So it's weird that I decided two weekends ago to make croissants. I've been wanting to try making them for so long, as there are few things I enjoy more than breaking into a hot croissant, slathering it in butter and jam with a fresh orange juice on a lazy sunday morning. After browsing recipes constantly, I decided that I needed a good two days off to do it. Two weekends back, I had my weekend off, and decided to go for it.. 

    It was so worth it. I really enjoy those Jus-Rol croissants that you get in a can, mum used to make them for us as treats or at Christmas when we were little, so I really wanted these to be better than that. I can safely say that they are SO much better than that. 


    I just used the first recipe I found, which happened to be Paul Hollywood's recipe - I figured his was probably a good recipe to use - however his recipe does has a lot of waffly wording in it, so I found a more condensed version on the uktv.co.uk website. I've combined the two below, with my own additions, so I'm not taking credit for the recipe but I've added my own comments...
    INGREDIENTS
    - 500g strong white bread flour, plus extra for dusting
    - 10g salt, plus a pinch for the eggwash
    - 80g caster sugar
    - 10g instant yeast
    - 300ml cool water
    - 300g chilled unsalted butter (a good quality butter, I used President)
    - 1 medium egg to glaze
    1. Place the flour, salt, sugar and yeast in a large mixing bowl. Using a wooden spoon, slowly mix in a little water until the mixture forms into a pliable dough.
    2. Place the dough on a floured surface and knead well until it feels elastic, I find about 15-20 minutes of good kneading.
    3. Place the dough in a lightly floured plastic bag, and place it in the fridge for an hour.
    4. Return the chilled dough to your floured work surface and roll it into a rectangular shape, around 60x20cm.
    5. Roll out the chilled butter into a rectangle about 1cm thick between two sheets of baking parchment, around 40x19cm.
    6. Place the butter rectangle at one end of the the dough rectangle, covering two thirds of the dough.
    7. Make a small cut in the butter (not going through the dough) and fold the dough third with no butter, over the butter layer. Then fold the remaining dough and butter third over this, to make a neat rectangle. 
    8. Pinch the edges to keep the butter in, and then place in a floured bag and return the dough to the refrigerator to chill for a further hour.
    9. Flour your surface again, and roll out the dough to a rectangular shape, around 60x20 cm. 
    10. Fold one-third of the dough into the middle, then fold the other third down over it, so you have another rectangle. Return to the plastic bag and refridgerate for a further hour.
    11. Repeat this process of folding and chilling two more times, then place in the bag again and chill overnight or for eight hours.
    12. On a floured surface, roll out to about 45x30cm and cut into two equal strips and trim the edges with a knife. 
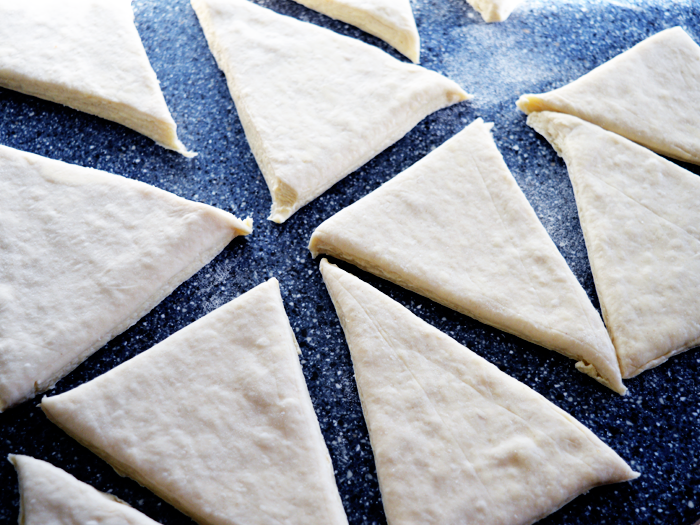
    13. Cut the dough into squares and then into two triangles, or into triangles with a 12cm wide base and 15cm high.
    14. Place the dough triangles on a floured surface with the narrow point facing you, pull it down slightly to length the crosisant. Then, starting at the wide base end, roll the triangle up over itself, you could then curl them in on themselves if you like. 
    15. Place the shaped croissants on baking trays lined with baking parchment and leave to rise for 1.5-2hrs. 
    16. Preheat the oven to 200C/180C fan/Gas 6. 
    17. Make an egg wash with a pinch of salt, and lightly egg-wash the croissants. Bake for 10-15 minutes until golden brown. 
    How amazing do those layers look?! The lamination with the butter makes them taste amazing, they don't even need butter when eating them, which I really like to use. Just jam, because when they cook the butter in the layers melts and makes the dough so moist and buttery. 

    There is no getting away from it, they do take a long time to make, but yes, they're definitely worth it! I know recipes that take days always say 'oh but they're worth it' and sometimes I go through all the faff and thing you know what, they're not worth it the hassle. You do need to have the time on your hands, but these croissants were hand-down the best pastries I've ever eaten. I've even got some dough chilling in the fridge as we speak, I'm making a batch this weekend and freezing them so we can have them on Christmas morning! I just ate with a selection of jams (pear and damson were the absolute best) but you could definitely have them with Nutella or something, or even put chocolate inside to make some pain au chocalat... 

    So, to summarise my thoughts on the homemade croissant: some things that are a right faff are definitely worth inhaling eating, maybe I'm not as impatient as I thought, you can get a surprising amount of present wrapping done between rolling turns, I could never get tired of these.

    Wednesday, October 22, 2014

    the almost perfect cinnamon bun + recipe


    The other week I was in the shower, and I cracked open a new bottle of Korres' Vanilla Cinnamon shower gel. Whilst singing along to my music and lathering up, I realised that the smell reminded me exactly of cinnamon buns. So after pottering about for the rest of the day, occasionally stopping to smell my arms because they smelled that good, I decided to just give in and make some cinnamon buns. 
    I searched around the internet for a good recipe, and came across this one from the Guardian website. It seemed like a good option, requiring less proving that most recipes, and using ingredients that I nearly all had in at home.
    INGREDIENTS:
    For the buns:
    300ml whole milk (I only had semi-skimmed, and it worked fine)
    1tsp ground cardamon seeds (about 25 pods)
    50g butter
    424g plain flour
    7g fast action yeast
    60g caster sugar
    1/4 tsp fine salt
    1 egg, beaten lightly
    oil, to grease

    For the filling:
    75g softened butter
    50g dark brown sugar (again, I only had light brown, it was fine, a little less treacly)
    3 tsp cinnamon
    1/2 tsp salt

    For the icing:
    125g icing sugar
    1.5 tbsp milk
    (note: I did not have any cream cheese, or I would've made cream cheese icing!)

    1. Put the milk and ground cardamom seeds in a small sauce-pan and bring to just below the boil. Take off the heat, stir in the butter, and then leave to infuse.
    2. Mix together all the dry ingredients in a large bowl. When the milk is no longer hot, and is just warm, make a well in the dry ingredients and the egg. Stir the egg in, then pour in the milk through a strainer. Stir until it comes together to make a soft dough that pulls away from the edge of the bowl.
    3. Oil your surface well, and your hands, and knead for five minutes. It is a very soft and wet dough, I found, but resist adding more flour. I didn't have a dough scraper, but I recommend using one for this!
    4. Wipe out the bowl and oil it lightly, then return the dough to the bowl. Cover, and leave somewhere warm for 30 minutes. (They suggest a cold oven, with a bowl of hot water, but we left hours at the back of the stove-top whilst the oven was on, and that worked well.)
    5. Whilst the dough is proving, make the filling by beating all the ingredients together until soft and easily spreadable. (Resist from eating, this mixture tastes so good.)
    6. Also whilst waiting, grease a cake tin.
    7. Roll out the dough on a lightly floured surface to a rectangle roughly 35 x 25cm. Spread the  filling mixture evenly across the dough, then roll dough into a sausage shape, starting from the long edge (like you would a swiss roll). Cut into eight even slices.
    8. Arrange the slices in a tin, evenly spaced, and leave to prove again for 30 minutes.
    9. Meanwhile, heat the oven to 200C/400F/Gas 6. Bake for 25 minutes or until golden brown.
    So there we go! They're best eaten fresh, obviously, and don't keep amazingly well, and would be much improved with some cream cheese icing and not the sugar icing that I made - but they hit the spot and weren't that hard, despite the multiple proves, etc. Next on my challenge list are croissants and doughnuts...

    Wednesday, October 15, 2014

    on learning how to make jam, or, post-harvest musings


    Now that we've had the first frost (why did it have to be a Sunday morning when I leave for work at 8AM, though?!), I feel like summer and, subsequently, harvest-time have finally drawn to a close, and we're officially into the colder months. This weekend I was walking along the hill at Alexandra Palace and enjoying the very fresh wind - as I regretted my decision to not bring a coat, I realised that meant summer was over. I know that Halloween is officially yet to come, and the pagan in me feels like that is the real end of the summer, but the frost, dark and misty mornings, low sun when driving home and orange crescent moons are telling me it's come already.
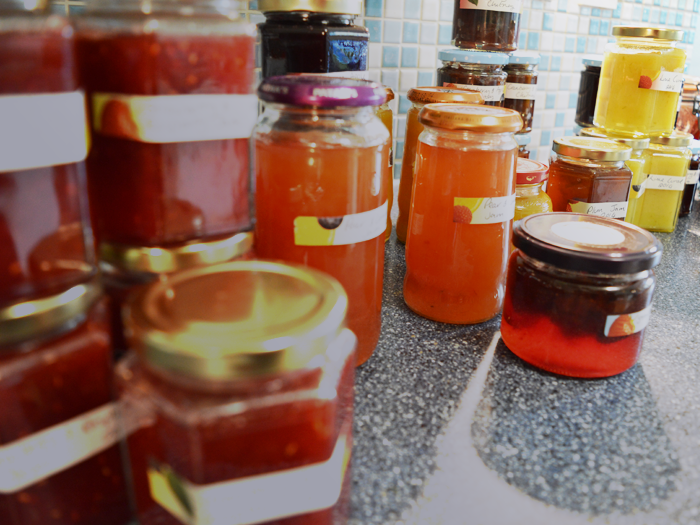
    Anyway, I digress - this year my mum has taken it upon herself to unofficially teach me how to make jam, jelly, chutney, curd and other preserves, so thought I'd show you a few photos I snapped of all the preserving-work we've been upto this year whilst I sat and labelled all our jars the other day.

    • It is hot work; I didn't really think about how warm it gets standing over a hot pan of sticky, sugary juice and fruit. 
    • Chutney makes your house stink like vinegar, no-matter how many windows you open - but making it on the most humid day of the year before a giant thunderstorm probably didn't help, either.
    • I miss the allotment, and the excitement of bringing home whatever was ready to eat. Although we didn't exactly make jam from the potatoes, it just makes me miss everything. Now the only place I'll be harvesting, for the foreseeable future, is the reduced soft-fruit section at Waitrose..
    • I enjoy quince jelly more than I thought I would - I had no idea it would smell so good cooking. It's weirdly floral, but yeah.
    • I also really enjoy eating jam straight from the jar, and that is generally how I consume it most. I feel like Joey in the one with the jam....
    • There is nothing greater than a jar of home-made lemon curd.
    • I want to try out some more adventurous things now that I've realised it's really not that hard. I still think it's stupid that they make them make their own jam for a victoria sponge on Great British Bake-Off, but it's really not that hard. 
    • Jam/sugar thermometers are really irritating. The jam gets caught underneath + behind them and then catches and burns and you end up with burnt jam bits in your lovely pear-jelly.
    • Licking the spoon until I feel sick makes me think I can never eat jam again. I always manage to eat some more the next day.
    • Bulk buying 50 jam-jars from Amazon may seem absurd when you receive that giant box one morning, but you'll be surprised and how many you've used. I think we have about twenty left?
    • People legitimately enjoy receiving it as presents, I've discovered, and even given the jars back for more, which is even more pleasing to know as it gives me an excuse to make more lemon curd. 
    • You'll find yourself rearranging your cupboards or fridge to make space for the jars.
    I might joke about how it's dirty work, but I love it. I'm weirdly sentimental, but both my grandmothers made jam and jelly and stuff, and it's something I associate so inherently with my mum - I think she's made some form of blackberry jam every year of my life since I can remember, and probably longer than that. It makes me smile to know that I'm learning too, and now I can scoff at those pretty jars of Bonne Maman jam when they're on offer in the shops, as I know I've got something nicer and tastier at home.

    Have you tried making jam yet? I promise you, it's insanely satisfying to see those colourful jars all laid out on the work-top and neatly labelled. Almost as satisfying as not knowing what kind of jam to have on my toast - do I go for the pear, plum, quince, damson, blackberry, apple, raspberry, strawberry...

    Tuesday, September 30, 2014

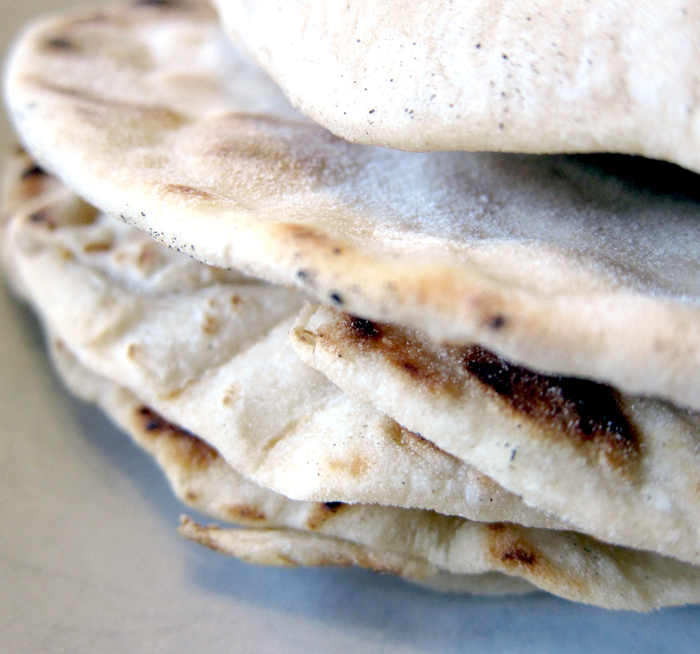
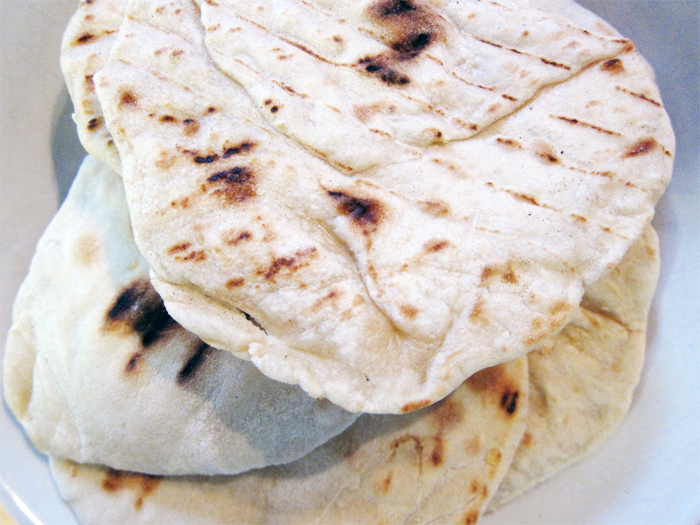
    homemade flatbreads + recipe


    This post starts with how most thrown-together recipes start: my mum making dinner and me wanting to bake something. She was making her ever-so-perfect chicken tagine the other week and I was in the mood for carbs, those on diets know the cravings come quickly and without warning.  
    A quick google later, we settled on Hugh Fearnley-Whittingstall's flatbreads, following this recipe on the wonderfully named blog, Mean Mothercooker. They were best eaten hot, straight from the pan, with a bowl of tzatiki and a spoonful of houmous as accompaniment.
    YOU'LL NEED:
    - 250g plain flour
    - 1 tsp sea salt
    - 1 tbsp olive oil
    - 150ml warm water.

    STEPS:
    1. In a bowl, combine flour and salt. Add the oil and water until it forms a dough.
    2. Knead on a floured surface for 5 minutes until the dough feels elastic and smooth.
    3. Return to the bowl, cover, leave to rest.
    4. When you're about to eat them, roll dough into a sausage and divide into 8 rounded balls of dough.
    5. On a floured surface, roll the balls into circles around 3mm thick.
    6. Heat a heavy-based, non stick frying pan (we used a griddle pan) until it is very hot.
    7. Turn the heat down, and place the flatbreads carefully in pan. Let the first side cook for about 2-3 minutes, until the dough no-longer sticks to the pan. Flip, and repeat but for 1-2 minutes on this side. Eat immediately.
    It's really very simple, and they're so great eaten hot. 

    Saturday, December 14, 2013

    do-it-yourself gifts - part four


    This year, I want to try and make as many presents as possible, because I want to give nice things to my friends and family even if I am a bit poor this year, because they still deserve nice things. Over the next two weekends I am going to show you some of my favourite items you can do for friends - that will cute and thoughtful, and won't break the bank. This is my last edition of these gift ideas - because I hope you're all sorted now, and I am working like mad up until Christmas now!
    These are last-minute-gifts - things you can throw together at home and have ready just in-case anyone unexpected pops round.
    • Jar mixes; cookies or biscuits or sweets, anything will go down well with my friends! You could make them yourself, but I know a lot of my friends enjoy baking, there are. Allrecipes has a lot of things that you can try, I think the best involve chocolate, really. Add a little label that says what else they need to add (usually butter or eggs or maybe a little milk) and the instructions (mix everything together, pretty much!) and tie a ribbon or some twine around the top and they look really cute, I think! Very easy to throw together at the last minute, all you need is a jar that you probably have knocking about the house.
    • Chocolate, sweets, etc; I've made chocolate truffles and peppermint creams in the past, this year I think I'm going to try my fudge recipe because it went down so well with my family earlier in the year, but they make really lovely gifts, much better than a store bought box of chocolates, I think. Put in cute bags or jars and it will look really sweet, I think. 
    • Flavoured alcohol; these are even quicker to make than anything else. Buy a cheapish bottle of vodka or gin and add a fruit of choice - I've made raspberry vodka, tangerine vodka and sloe gin this year. All you do is add the fruit directly into the vodka with some sugar and then leave to sit for as long as you can. Strain out the fruit when you're giving it to someone, and it tastes fantastic. Nigel Slaterhas a good sloe gin recipe if you want to stick to one!

    Sunday, December 08, 2013

    do-it-yourself gifts - part three


    This year, I want to try and make as many presents as possible, because I want to give nice things to my friends and family even if I am a bit poor this year, because they still deserve nice things. Over the next two weekends I am going to show you some of my favourite items you can do for friends - that will cute and thoughtful, and won't break the bank, particular now we're into December and time is running out to gather fancy ingredients.
    Todays recipes are for those amongst you who have friends and family who are - I hate to say this word because it's a little cringey - foodies. My brother and his girlfriend love fancy restaurants and such, so I always think that if they would like any of this, I'm on the right track. These can also be done in batches, or would be great to fill out a hamper.
    • Chili oil or chili jam; or any other kind of flavoured oil or jam. I just know that a bottle of chili oil goes down very well, and isn't that hard to make. It goes well in cooking or as a dressing for lots of things, and very nicely in stir-fries. The BBC have a good recipe for both oil and jam and so does thanksforthefood.com. However, you can do regular jam or marmalade, or something similar if the chili-thing won't go down well.
    • Cranberry chutney; nothing, and I mean nothing feels like Christmas until I have had a brie and cranberry sandwich. There is something so perfect about gently toasted bread and melty brie with a sharp bit of cranberry chutney. It's also really good with ham and other cheeses and there is something about the fruity chutney that just tastes so good. I give you only one recipe: Delia's, because my mother only really trusts Delia! Of course, you could do thinks other than cranberry, or mix things with the cranberry if you're feeling adventurous. 
    • Flavoured butter; this is a bit harder to gift, as it needs chilling, but it would be great to give to something who loves a bit of flavour. Baked in a foil bag with some fish, these can be really great to have in the house, ready to go to spice up any boring dish, so I think some people would really love them. Wrap in wax paper with some twine around the ends like a cracker, and make a little label, and try out these recipies from here and here.
    gifts - part one
    gifts - part two

    How is your shopping getting on - getting there? No, me neither.. haha. I thought I was so organised last week!
      UA-21892945-2