Showing posts with label how to. Show all posts

Friday, September 11, 2015

How to get a better night's sleep...

I am a reformed insomniac - when I was younger I struggled a lot with sleeping. I mean full on, several days where I didn't sleep, and you turn into someone from the walking dead. In more recent years I have got better, and as such I am intensely precious about sleeping, and getting the best nights sleep that I can.

how to get a better nights sleep

There are certain things I've learned over the years to get the best nights sleep possible, and I thought I'd share them with you..

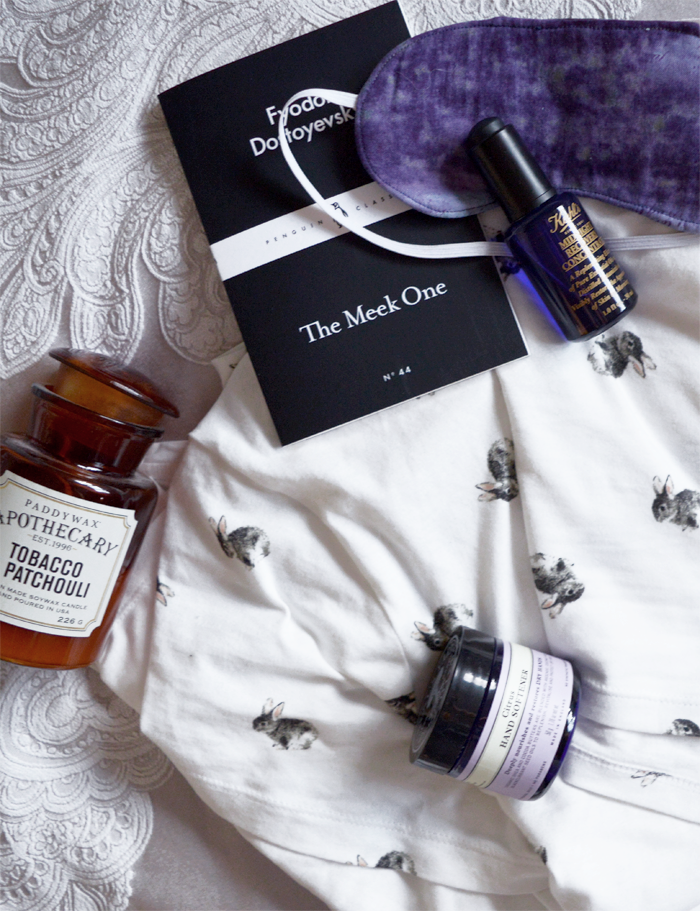
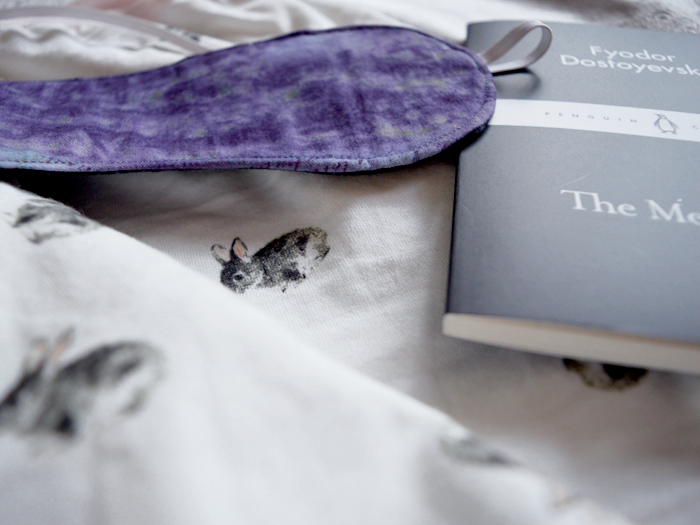
  • GET COMFY: Get your bed to be in the comfiest state possible, get your nicest sheets on, put your comfiest PJ's on (mine are currently this adorable rabbit t-shirt and shorts set from Next) with my lovely Christy bedding
  • PAMPER TIME: I find that it's really nice to spend some time by yourself. I know that's sometimes difficult in an time of constant contact, of smartphones & social media. I find it amazing to turn your phone off, paint your nails, have a bath, put a face mask on or slather yourself in moisturiser. This will help adjust your internal clock too, as there is a wavelength in the blue light that comes from a laptop or smartphone that can affect your circadian rhythms. 
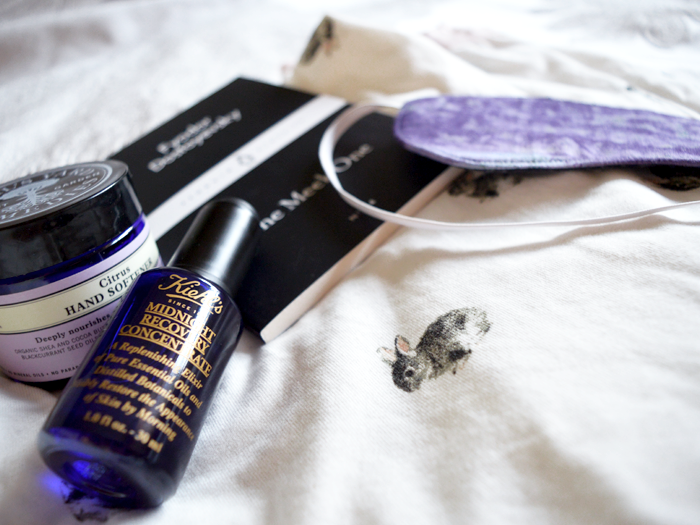
  • AROMATHERAPY HOUR: There is something weirdly calming about smells, isn't there? I find the the best thing is this beautiful tobbacco & patchouli candle, which smells wonderful, and the Kiehl's Midnight Recovery Concentrate facial oil does the trick also (it must be all those lovely smelling essential oils, as it sends me off to sleep every time.
  • RELAXING READING: Similarly to pampering yourself, I highly recommend just reading something before bed (not your Twitter timeline, either) - it relaxes the brain and mentally quietens your brain for sleep by making you concentrate. I particularly like these little black classics from Penguin, as they're interesting enough, but short enough to not feel guilty for falling asleep on.
  • KEEP IT DARK: I've recently discovered the use of a sleep mask, and I'm hooked. I never really understand these, particularly as I used to not be able to sleep without background noise or something to listen to, and always thought they were kind of stupid. However my mum knocked me this one up to see if I could get some use out of it and amazingly, I love it. I think it's also a mental thing, like telling my body, it's time to sleep now, but it works... 

How do you get the best nights sleep?


how to get a better nights sleep

Wednesday, April 22, 2015

Super easy seasonal iced biscuits!

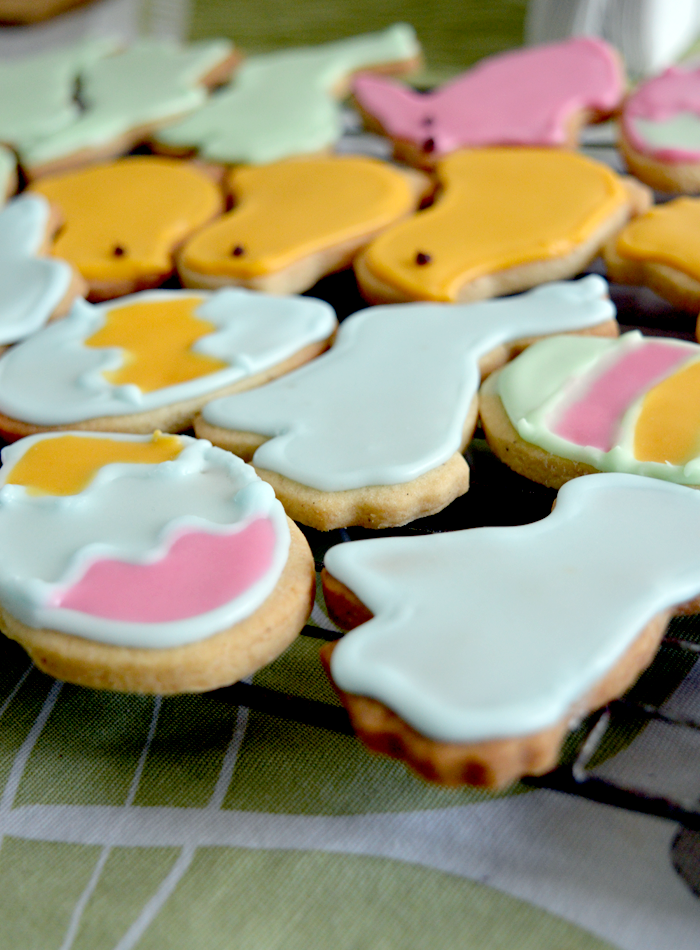
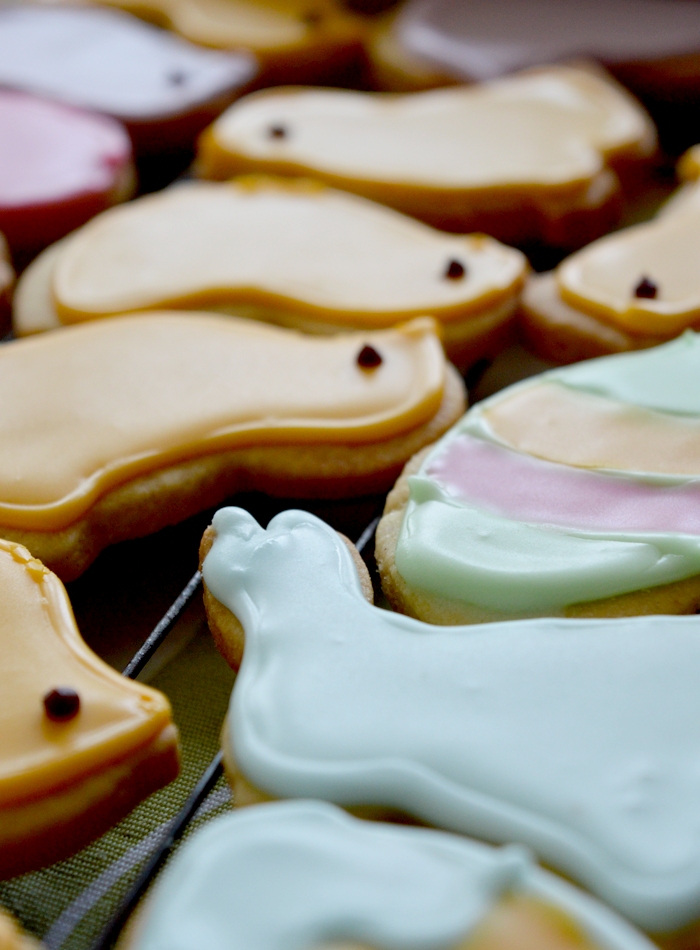
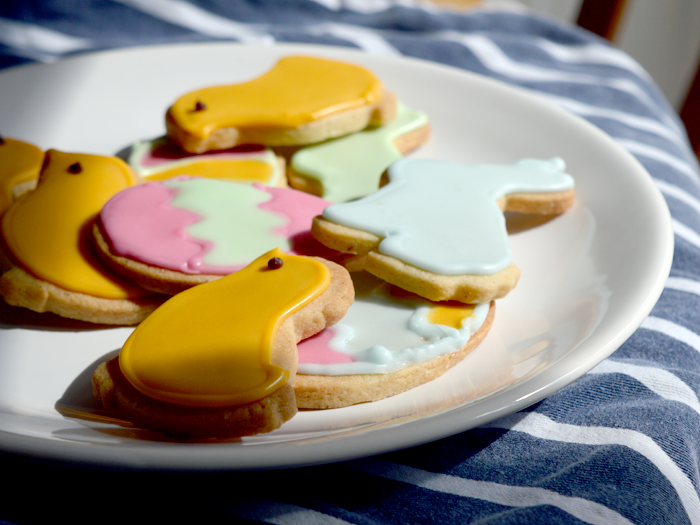
If you're blogger, you should remember to post your content when it's most relevant, really, shouldn't you? Like, who wants a Christmas gift-guide on the 24 December? Anyway, I'm being a shit blogger, because I completely forgot to post my Easter biscuits, and now Easter is almost a month behind us, but hey-ho, I'm showing you them anyway, because they look goddamn adorable, I think.
My mum called me on Good Friday and showed me the biscuits she'd made, asking if she wanted me to help ice them... Who am I to resist?! 

easter biscuits
easter biscuits

The recipe for the biscuits itself, I can take no credit for - my mother made them, and I only iced them! But she reliable informed me that the recipe she used was this one from The Pink Whisk and they tasted amazing when baked to perfection. She also tells me that she used vanilla powder in place of vanilla essence! 
INGREDIENTS AND EQUIPMENT:
- 1 pack of Royal Icing or Icing Sugar
- Water at room temperature
- Several piping bags (or sandwich/food bags if you're cheap like me haha)
- Several small bowls and teaspoons
- Food colouring
- Cocktail sticks
1. Mix the icing to the instructions on the packet, depending on what brand you use, most of them will tell you how much water to add to the icing sugar. We measured out the water and then added it until I got the consistency I wanted. At this point, you want the icing to be quite thick, thick enough that you can pipe it and it will hold it's shape.
2. Split the mixture between bowls evenly, and add the colouring. For pastel colours, add a very small amount of the colouring, and mix well.
3. Spoon some of the thick icing into the piping bags (leaving some for flooding the biscuits) and pipe around the edge of the the biscuit shape to create an outline. For shapes like the eggs, pipe the desired design (like stripes or zig-zags).
4. Set aside and allow this outline to dry until solid and hard.
5. Add more water to the remaining icing in the bowls to create a more liquid consistency, it should run off the spoon with ease.
6. Using small teaspoons, add a small amount of the runny icing inside the outline you've already made.
7. To move the icing into the corners of the shape, tilt the biscuits or gently move with the back of a teaspoon. This is also where the cocktail sticks come in useful, to push the icing into awkward corners and to get rid of air-bubbles.
8. Allow to dry until completely hard.
These went down an absolute treat in our house, I must say! And there was not one child in sight, haha, but I imagine they would go down very well with kids. I think the yellow chicks and the blue bunnies were my favourites, and if you're interested, we got the biscuit cutters from Waitrose, they do a great selection of seasonal ones for Easter, Halloween, Christmas, etc.

Have you got a favourite biscuit recipe you go for?
- recipes -

easter biscuits
easter biscuits

Monday, February 09, 2015

how to create and use an editorial calendar

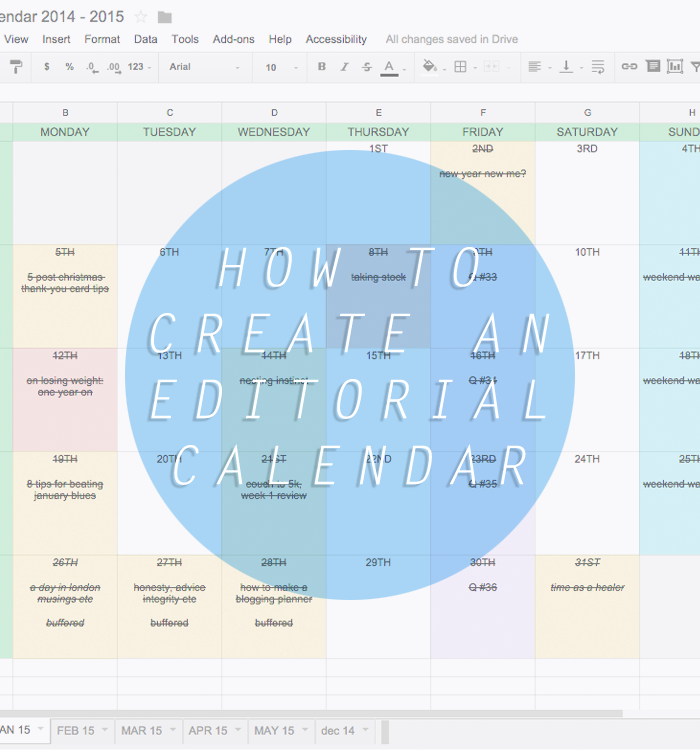
how to create an editorial calendar

I've wanted to talk about how to create an editorial calendar for blogging for the longest time, because it's really changed how I plan blog posts, how I schedule content and keep myself organised in general. 
I mentioned last week how I love to use a little handwritten planner to keep track of things I want to do, ideas that spring to mind, or content that I need to write, and I do really love that method for the creative side of things. However, once the copy is written, photos are taken, and posts are are ready to be published, I like to bring my up editorial calendar to have a look at when I'll post. 

There are so many ways out there to create an editorial calendar, from traditional diaries, printables, and even apps like CoSchedule, but I prefer this method, which I had sort of attempted doing before I found the lovely Gillian' tutorial over at Elevator Musik for how to set this up properly and a lot of this post is inspired by hers, so please go check it out, it's all much prettier than mine! I've been using this for blogging since May 2014, and it's been so brilliant! The amount of posts I wrote in 2014 tripled from 2013, and I think this is in part to getting organised. Some of this organisation may seem like over-kill for something that is a hobby of mine, but I enjoy getting myself organised!


GET YOUR SPREADSHEET SET UP
You can use any format you like, obviously, but I love to use my Google Drive for my calendar, as it's accessible from anywhere, saves automatically, and is just really easy to bring up when I'm blogging, as I have it bookmarked on my toolbar. Go to your Google Docs, and from the drop down menu at the side, select Sheets, then press the green cross in the bottom corner to bring up a new spreadsheet - it's pretty much as easy as that. Name it something obvious, that you can find, like Blog Calendar 2015, then you're ready...
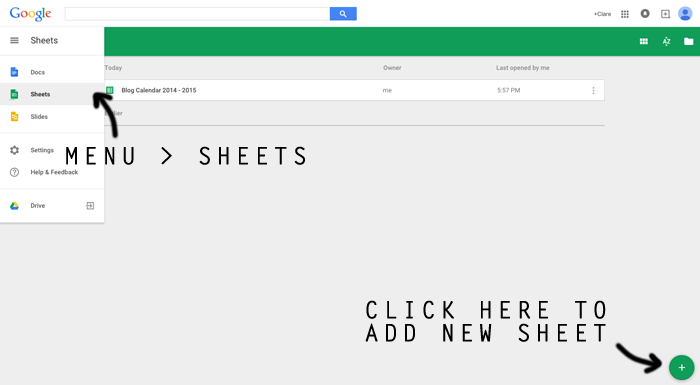
how to create an editorial calendar 1


MAKE IT LOOK PRETTY
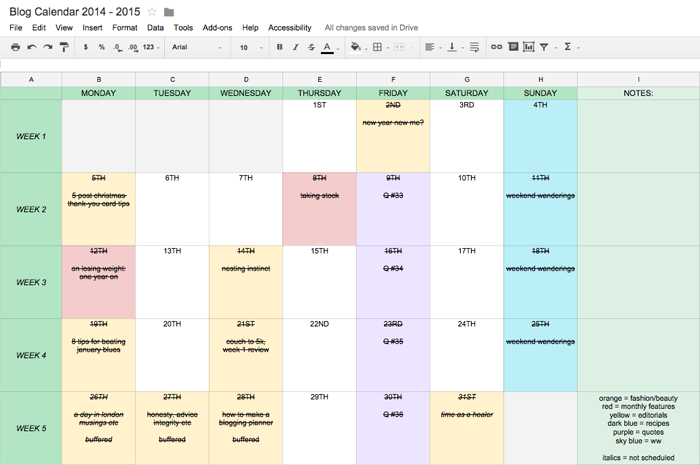
This is the fun bit, you can make this look like whatever you like. I copied Gillian's format for this, in having the days across the top, and then Week 1-5 down the left hand side. I made it match my blog colours/font, cause I'm ridiculous like that, simply put. You can make all your cells the same size, highlight all the columns/rows you want, then right click and select Resize columns, and enter a defined value for them. You can use the colour picker to select a colour that suits your blog, and make the font match and all sorts.
At the bottom (which I annoyingly cut off in these images, but you can see in my main image, at the top of the post) you can see that I created tabs for each month, and I fill in the dates manually using the calendar on my phone or laptop. 
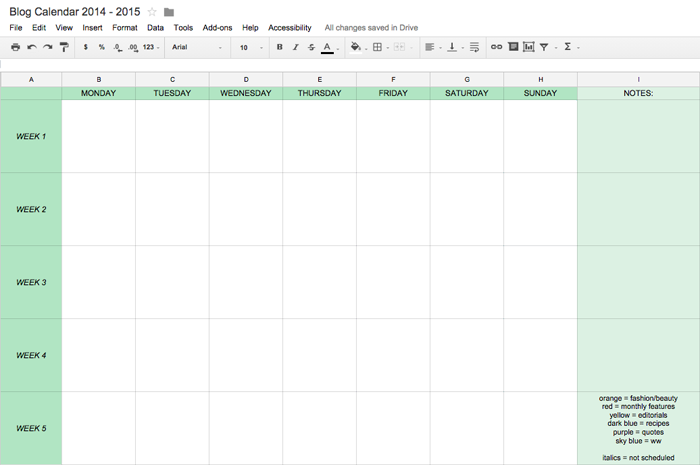
how to create an editorial calendar 2


FIGURE OUT A SYSTEM YOU'LL USE
Like with my blog planner, it takes using the calendar to find out how to make it work for you. I set myself up with a key, using different coloured highlighted squares to figure out how to plan my content. For example, you can see that his month I didn't post any recipes because I was posting other kind of content that I enjoyed writing, so it's all sort of swings and roundabouts. I have regular features on Friday and Sunday, so I fill those columns in ahead of time, as I know that they'll be frequent features. You can see that the beginning of January was a bit all over the place, because I was getting back into the swing of things, post-Christmas, but it really does help me stick to my posting schedule. When I've scheduled a post, I strikethrough the whole box, and it makes me like I've accomplished something! 
how to create an editorial calendar 3

SOME EXTRA TIPS:
  • I like to be able to see the last month, to compare the kind of content I've posted, but anything before that clutters up my workspace. Right click on the old page tab at the bottom of the page and select hide sheet. To view the sheet again, select View > View Hidden Sheets... From the toolbar, and you'll have access to them all again.
  • I used the Notes column more frequently untilI set up my blog planner, but I like to still have there, just in case I need to add comments or reminders to myself, and I haven't got my planner to hand.
  • I've recently started adding the 'buffered' comment to my calendar, to remind me that I need to scheduled tweets for that post, also. 
  • I use italics to add in posts that I write, that are 'last minute' additions. They're ones that I haven't planned on posting necessarily, they're written then and there and published on the spot. 
  • I highlight boxes bright red, as opposed to their corresponding colour, if I know I haven't yet completed everything for that certain post, and it reminds me that the post needs something doing for it!
  • I like to stay about one-week ahead of schedule, so I have some time to write some posts if I feel like I'm short on content that week. You can see that like 95% of my content is scheduled, and I know from recent Twitter chats that some people have a problem with that, but I don't see how it make a damn bit of difference! haha
And there we go, hopefully this helps a little bit! There are hundreds of ways out there to make an editorial calendar work for you, though - if this doesn't float your boat, try looking on Pinterest for inspiration, or turn your hand to making your own. 
Do you use an editorial calendar? Share how it helps you in the comments below, I love finding out new things! 

Wednesday, January 28, 2015

how to: make a blogging planner

how to make a blogging planner

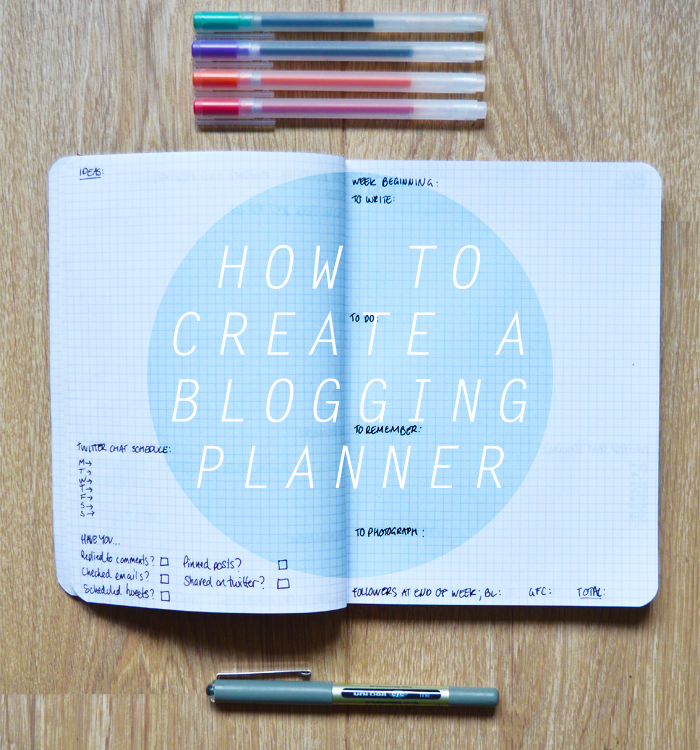
I've been trying really hard to keep my blog organised this year, it was one of my goals for the year, to try and keep up with my blog whilst working and looking for new jobs. It's hard to keep everything organised and ticking over, and I was always making lists that I would lose or accidentally delete on my phone... Fed up of this, I looked into blogging planners, and all sorts of things, before deciding to make one of my own.

For this, all you need is a notebook (I like a squared one), a black pen and a coloured pen (or several, if that helps motivate and organise you!). It's really that easy and simple! I like to use a plain notebook, because this way I can adjust it to suit my needs and I'm not constricted by other peoples design. It does take a wee bit of configuring, to find what sections you'll use most, and what you don't. I've been trialling this for a few weeks, and I've found these headings the most useful for me, but you may want to play around with it for a bit until you find the right system that really works for you. 
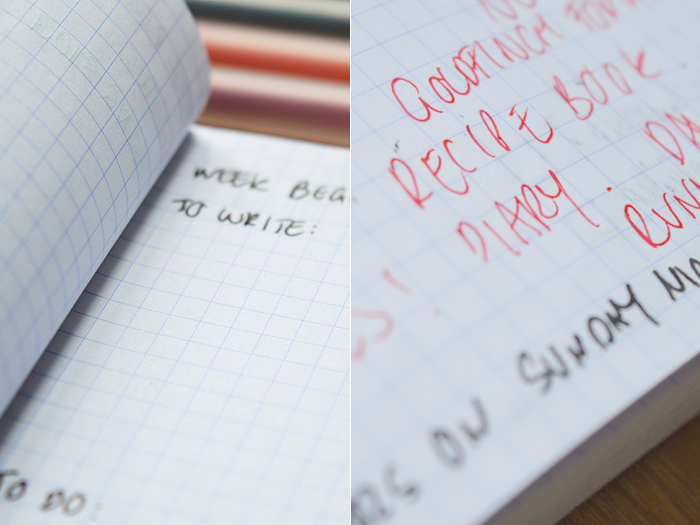
TO WRITE: These are blog-posts that I need to write for that week or the coming week. When I've finished them, I cross them through, or I highlight them to make a note of overdue post. I also make a note here if for example, I've written and note scheduled it, or it needs photos to be put into the post, etc.

TO DO:
These are things that I need to get done, which might not be writing blog posts, etc, maybe it's replying to a certain email, finding an image for a post, editing some photographs or images, or updating an on-going series post... Just little things that I need to get done, that have a deadline on them.

TO REMEMBER:
These are tasks that are important, but not imminent. It might be that I need to check when one my advert campaigns ends, or to take part in a twitter chat, follow up links from a chat, or to schedule something for in the future. Like the to do section, but less time sensitive.

TO PHOTOGRAPH:
This tab is pretty self-explanatory, but it helps, particularly in the winter when light is a precious commodity. If I need to photograph something, I can make sure I get ready to take the photographs the day before, and won't have to faff about and wonder what else I need to get photographed! 
You could make this a daily system, but I don't have that much to do in a day, so I make it for the week, writing the date for a Monday at the top of the page. At the bottom of this page, I also make a note for Sunday night, to check my followers on Bloglovin'/GFC, and a total, so I can see if I gained a certain amount of followers that week, whether it was due to a certain post, or chat, etc... It's just helps to keep me motivated, I find.

On the opposite page, I use a few different headings that I'm still sort of configuring...
IDEAS: A little vague, but obvious at the same time - this is where I brainstorm and make notes of future blog posts, it might be a title or it might be a list, or a sentence, or just a word, it's just some space for me to jot down ideas when they come to me (this is usually whilst I'm writing other blogposts, so it's good to have this to hand). 
TWITTER CHAT SCHEDULES: For the longest time I was awful at forgetting when all the chats were, despite very helpful people taking the time to make blog-posts scheduling them all! I've taken to writing down the times and days of the chats that I actively take part it (mainly, #bdib and #lbloggers, but #healthyselves sometimes, I always forget about #fdbloggers). I like to tick them off when I've participated, to keep a track of when I can make it or not.
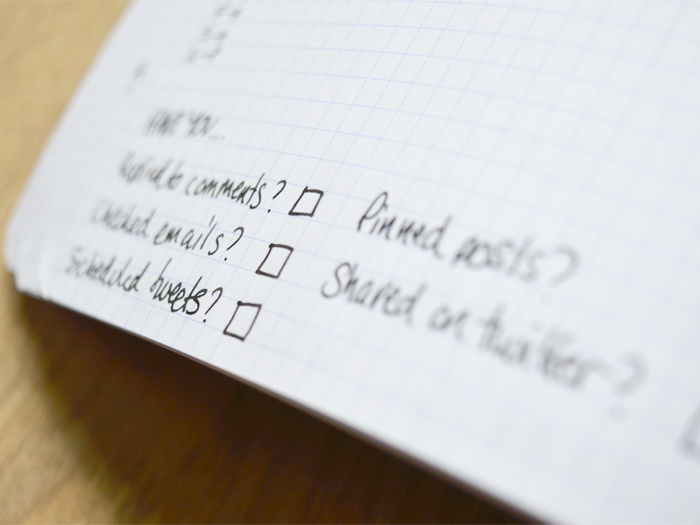
HAVE YOU...: This is to remind me to do all the blog admin that I need to do, basically! I'm shit at remembering stuff, plain and simply. My friends will know how rubbish I am at replying to texts, and blog admin is no exception. I think I'll adjust this in the future depending on how much use I find it, but I have a few main things to check off; Replied to comments, checked emails, scheduled tweets (the bane of my life, I always forget!), pinned posts (likewise!), shared on twitter. 
Have you tried a blogging planner, or have any tips on how to use one? I've found it's really motivated me in terms of planning posts and checking off lists. For example on Sunday, I knew I had a lot of things to photograph for future posts, so I made a small list of what things I need to photograph, for what posts, and blasted through all those pictures in about an hour! I'm finding it really useful, and hopefully I'll keep using it.

How do you keep organised on your blog?!

how to make a blogging planner

Tuesday, November 25, 2014

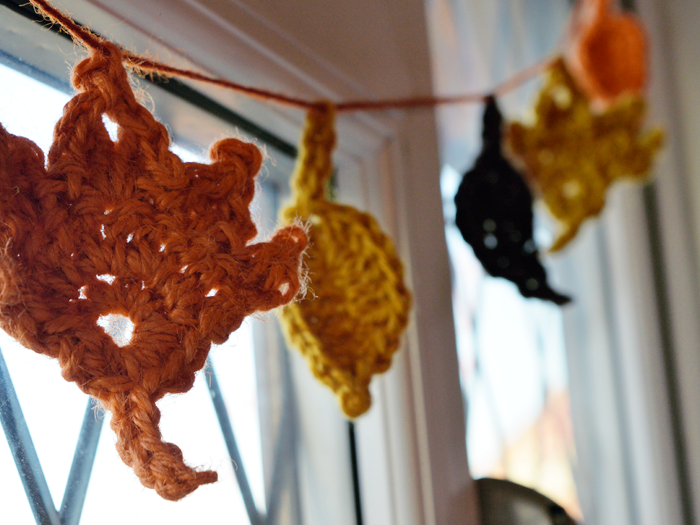
autumn leaf bunting diy


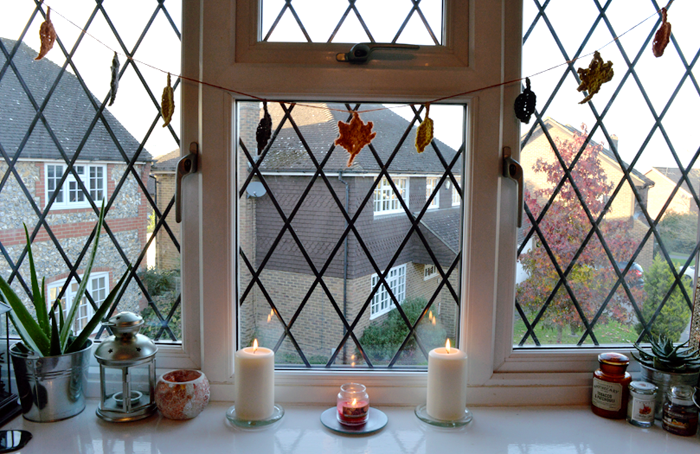
I thought I'd show you guys my most recent make, that is hanging proudly in my window, my little autumn leaf bunting. Having been a fan of Attic-24 and her kind of bunting for a while now, I wanted to do something similar that was more me. I'd had this nutscene twine hanging about for a bit and thought I would make some little autumn-leaf bunting. It's a fairly similar pattern, so I'm just linking to the ones that I used, but thought you might like to know how I did it..

YOU'LL NEED:
- crochet hook, suitable for the size of yarn or twine you're using
- a method of hanging, I like those 3M hooks.
- needle

1. I'm not going to repost the crochet instructions here, partly because I'm crap at crochet, and there are so many out there to choose from. I used this pattern for the large leaf and the medium fat bottom leaf from this page, for the small ones.
2. I will say that if you're using the twine, it's pretty hard on the hands to crochet with,and I found it really tough to just crochet in general, so you may need to be wary of that.
3. Leave enough string to hang them from. I found that I could easily get 1 large leaf and 2 small ones from each small roll of twine, with a length to spare - but then ended up with a giant knot in one of them and had to use the leftover length...
4. When you've crocheted all your leaves, use an iron to gently steam them flat as they have a tendency to curl in on themselves.
5. Sew in any ends, and thread through with a needle onto your length of yarn and hang in your window.
So there you go, it's pretty simple but it looks really cute, and it'll be staying up well into the new year, I think. I might even try making a Christmas-themed garland, though I might try a knitted one next time, because I'm really not very good at crochet (I had to have my mum help me with these because I get super confused between the US/UK crochet terms haha). Let me know if you try this out, I'd love to see photos! 

Wednesday, September 03, 2014

diy coconut + sea salt foot scrub


I pretty much live in boots for ten months of the year, and then panic when it gets too hot to wear them - I'm not big into other kinds of shoes. So when I recently purchased some shiny new Birkenstock sandals earlier in the summer, and have been wearing them religiously, I knew I needed to do something about my feet. After wearing them for about a month solid, complete with trips to the lake, long walks around the local nature reserve and getting bit to pieces at the allotment - it has led to some, well, less than pretty feet. I got through the end of my Soap & Glory scrub (which I do not recommend, really) and thought I would try and make one, as scrubs are pretty easy to mix together (this took less than five minutes, pretty much).
YOU'LL NEED:
- Sea-salt (or sugar, if you want a gentler scrub that can be used all over the body).
- Coconut oil (liquid).
- Vitamin E oil.
- Tangerine essential oil (this mostly for scent, so pick whatever you like, or you can leave out if you are sensitive to essential oils).
- Jar or container to put it in, I used a little Kilner jar I had lying around.

STEPS:
1. Fill the container one third full with the coconut oil.
2. Add in about a tablespoon of Vitamin E oil and a few drops of the tangerine essential oil.
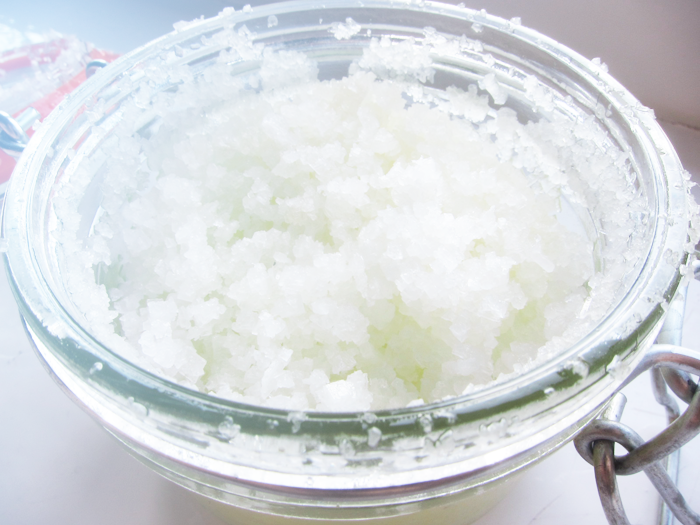
3. Mix in sea-salt gradually until the jar is about two thirds full.
4. If necessary, add a bit more coconut oil to the mixture. You want to saturate the salt with the oil. You can also add more essential oil at this step, if you think it needs it.
As you can see, it's like the least complicated thing to make, ever. It's basically just stick everything in a jar, and mix it. You can adjust the ingredients to whatever you like, personally. You can switch out the coconut oil if you don't like it, and use something else instead - similarly you can use whatever oils you want that you personally like. I had some leftover tangerine essential oil from something else, so I added that in, but if you really love rose or lavender, put that in.
I really love using this in the bath, because it sinks into the skin really well, and you're left with lovely, soft skin afterwards.
Let me know if you try this out! I'd love to hear if you make your own foot or body scrubs, as I'm getting to the end of this jar, and I want to try out something new... 
UA-21892945-2